
Step 3 – Create Custom Forms
A custom form is a specialized tool that enables agencies to create tailored applications and registration forms for candidates and clients, streamlining the process of gathering essential information. Custom Forms are particularly useful for capturing leads and can be embedded on the business’s website.
Our User-Friendly Interface allows you to create personalized forms with various types of question formats, vanity labels, and sections.
To start crafting forms follow these steps:
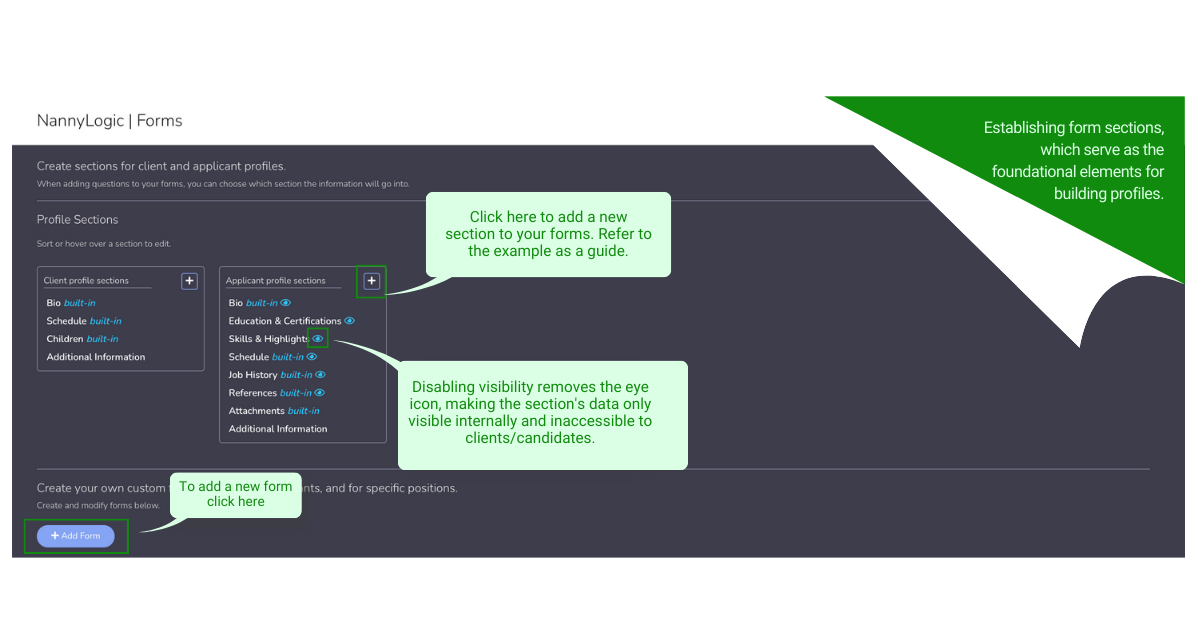
Begin by establishing form sections, which serve as the foundational elements for building profiles. When candidates respond to questions within the application or other forms, assigning the appropriate section labels to the questions ensures that the answers are systematically populated within the candidate’s profile, maintaining organization and aligning with the relevant profile sections.
To add sections follow these steps:
- Navigate to the left-side main menu and click on “Company”>”Forms”
- Create sections for client and applicant profiles under “Profile Sections”
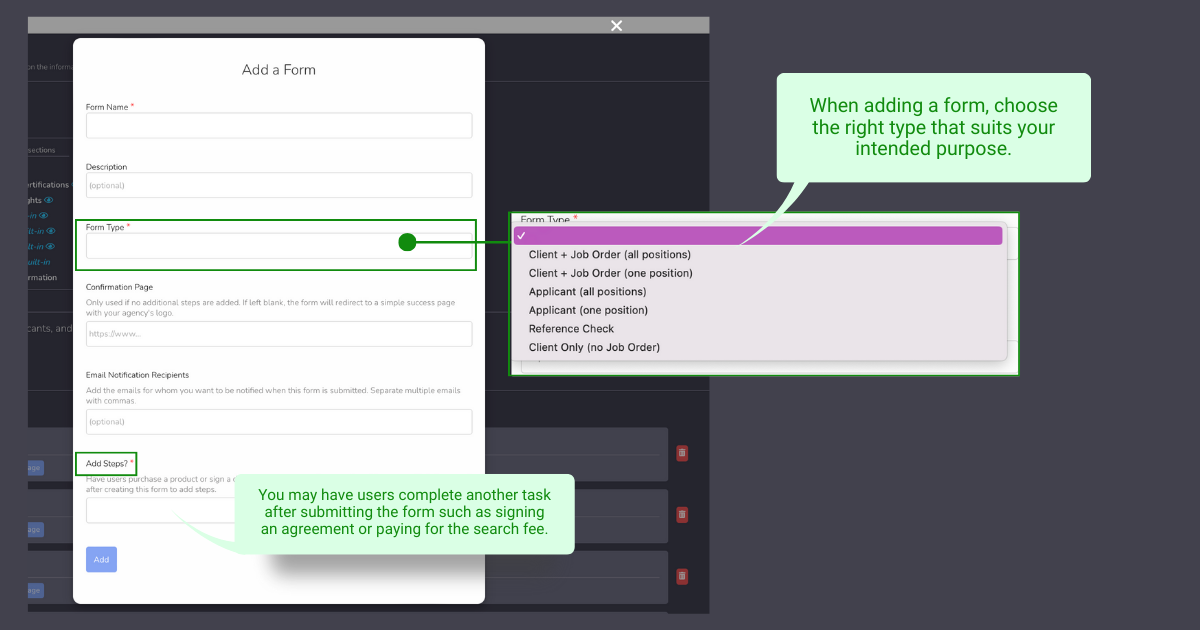
After setting up sections you are now ready to build your forms!
- Scroll down and Select the “Add Template” button.
- The form builder mode will load and you may start adding your questions to the form. On the top of the page, you will have your question tools and your “Additional Items Tool Box“. The Items Tool Box contains drag-and-drop values/pre-built questions and it differs from the client and candidate form building information.
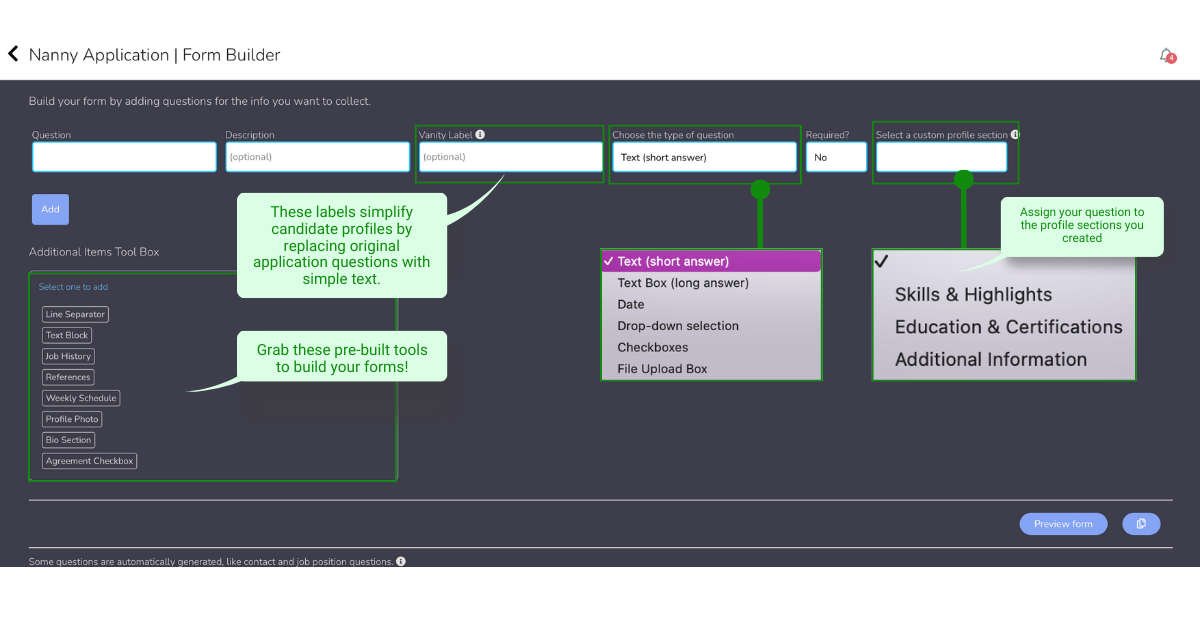
Creating a question is easy, see the example below:
- Click on Add and it will create the question and add it to the bottom of the form. You may drag and drop each question for easy organization and flow.
- You may also edit the question by clicking on the pencil icon
- Once you are done, select “Preview Form” to ensure it is how you’d like the form to present itself.
- To embed the form to your website, copy the HTML Code located next to the “Preview Form” button.
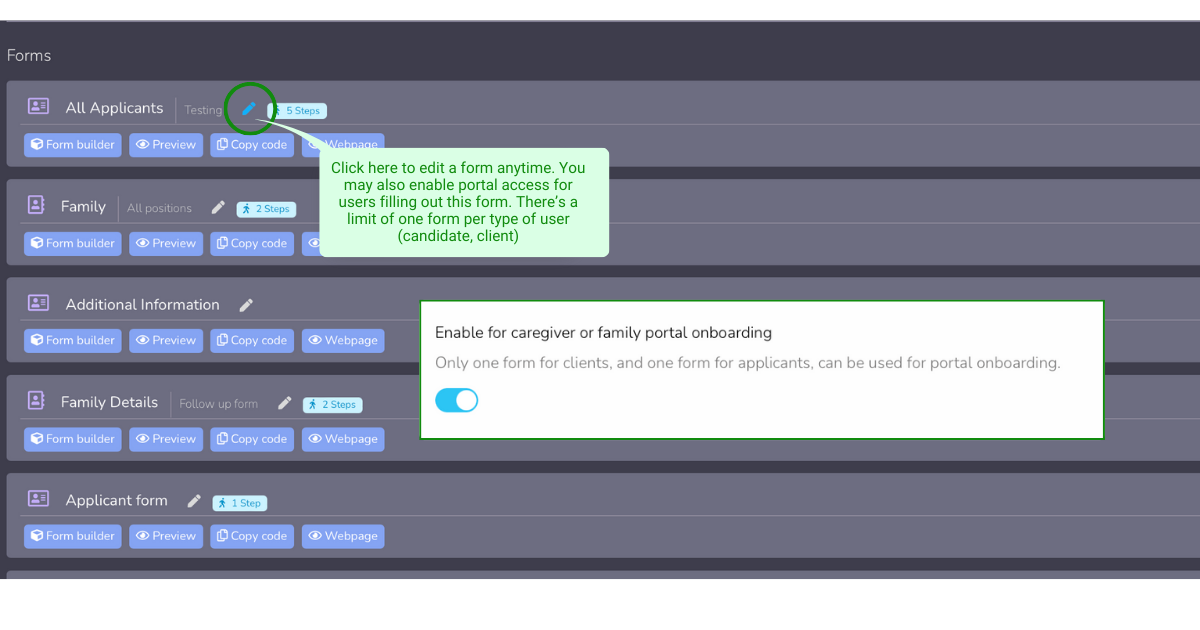
NOTE: To enable portals please go back to the form main page and click on the pencil icon to edit the form. Check the portal enabling option. Please note you may only have one portal per client form and one per candidate.
Adding Forms to Your Website
- Access Your Website Editor:
- Log in to the platform where you manage your website. This is usually a content management system (CMS) like WordPress, Wix, or Squarespace.
- Navigate to the Page:
- Go to the specific webpage where you want to add the form. If you’re creating a new page, follow the steps to create one.
- Linking to the Web Page Version:
- If you prefer linking to the web page version:
- Publish the form on a dedicated webpage. Ensure it’s accessible and functional.
- Copy the URL of the form page located on the main form page: click on the Webpage button and copy the URL.
- Go back to your website editor.
- Add a new link to your webpage. This link can be added to a menu, button, or any other appropriate element.
- Paste the copied URL as the destination for the link.
- If you want to embed the form directly:
- Obtain the embed code for your form from the form builder.
- Go to the page in your website editor where you want to add the form.
- Look for an “Embed” or “HTML” element in your editor.
- Paste the embed code into this element.
- Save or update your webpage.
- If you prefer linking to the web page version:
- Embedding the Form:
- If you want to embed the form directly:
- Obtain the embed code for your form from the form builder by clicking on the copy code button.
- Go to the page in your website editor where you want to add the form.
- Look for an “Embed” or “HTML” element in your editor.
- Paste the embed code into this element.
- Save or update your webpage.
- If you want to embed the form directly:
- Preview and Test:
- Preview your webpage to ensure the form appears as expected.
- Test the form to make sure it functions correctly, accepting and processing user input.
- Publish Your Changes:
- Once you are satisfied with the changes, publish or update your website to make the form live.
By following these steps, you can successfully add NannyLogic forms to your website, either by linking to a dedicated form page or by embedding the form directly into your web pages. If you have any questions or encounter issues, refer to the support documentation of your website platform or reach out to our support team at support@nannylogic.com.