How Can We Help?
Step 5 – Upload Docs and/or Craft Custom Contracts
Crafting a personalized contract allows your clients and candidates to input information into designated fields, streamlining and optimizing your onboarding process. Follow these steps to create and manage personalized contracts:
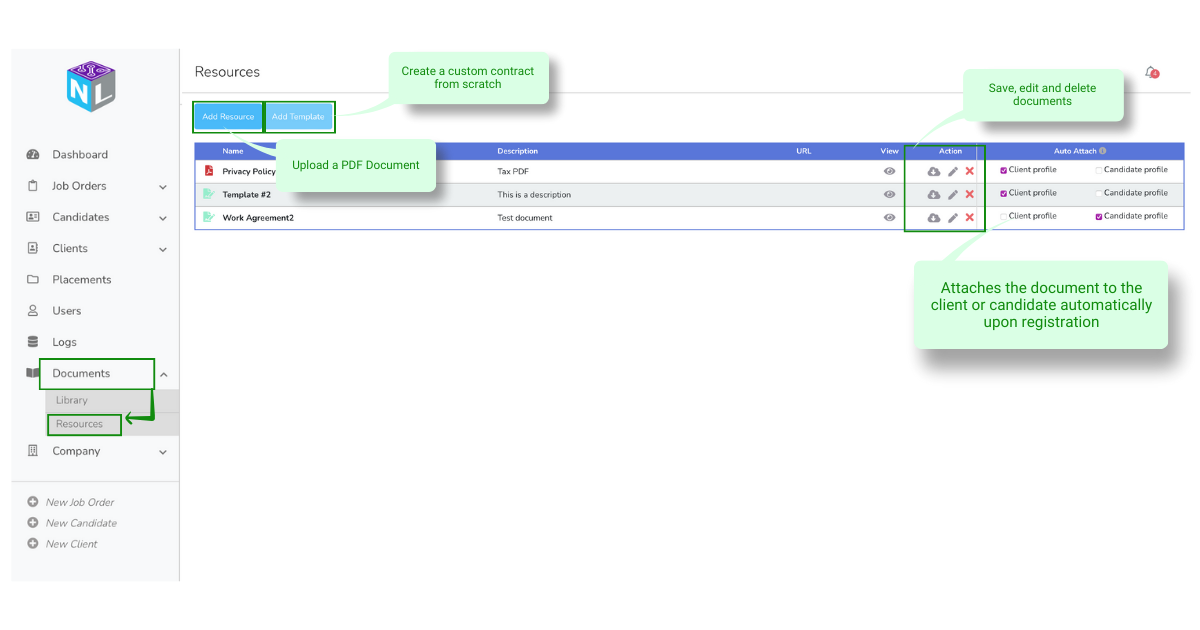
- Create a Template in Resources:
- Navigate to the Documents Tab from the left-side main menu.
- Select RESOURCES.
- Click on ADD TEMPLATE.
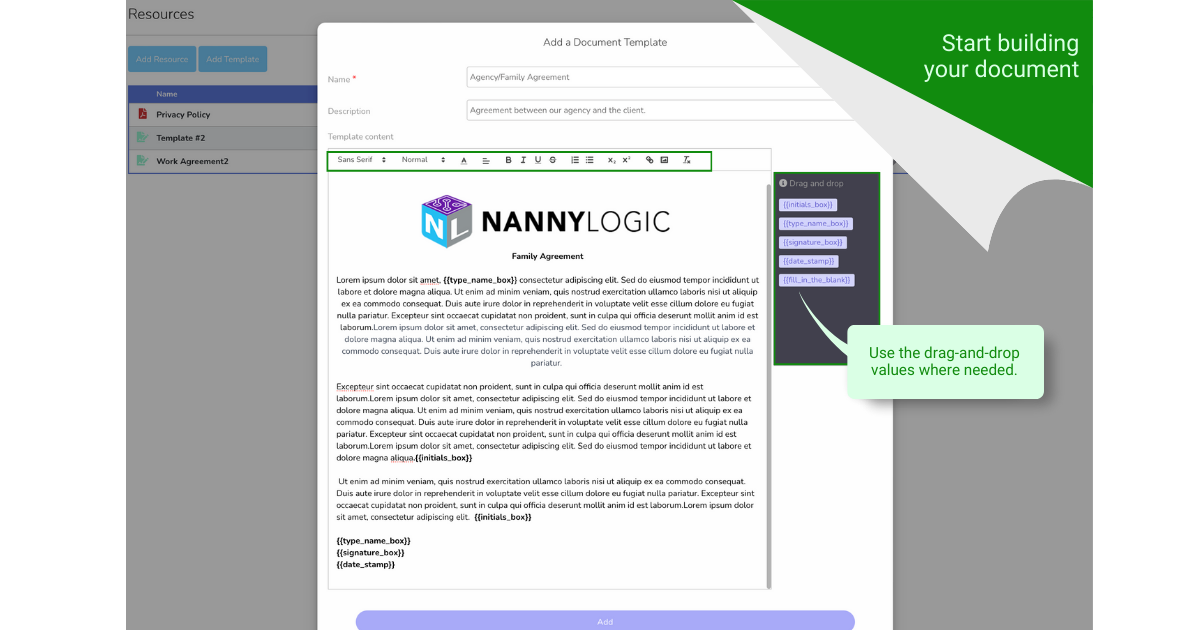
- Provide a name, description, and template content.
- Customize with Drag-and-Drop Values:
- Utilize the drag-and-drop feature for easy incorporation of fields such as initials, names, signatures, dates, and fill-in-the-blank spaces.
- Enhance versatility by inserting images and hyperlinks as needed.
- Complete the Template:
- Add relevant images and hyperlinks using the dedicated icons.
- Incorporate drop-and-drop values for applicants to input information manually.
- Include signature boxes and date stamps for a comprehensive contract.
- Save Your Template:
- Click on ADD to save your customized contract/document template.
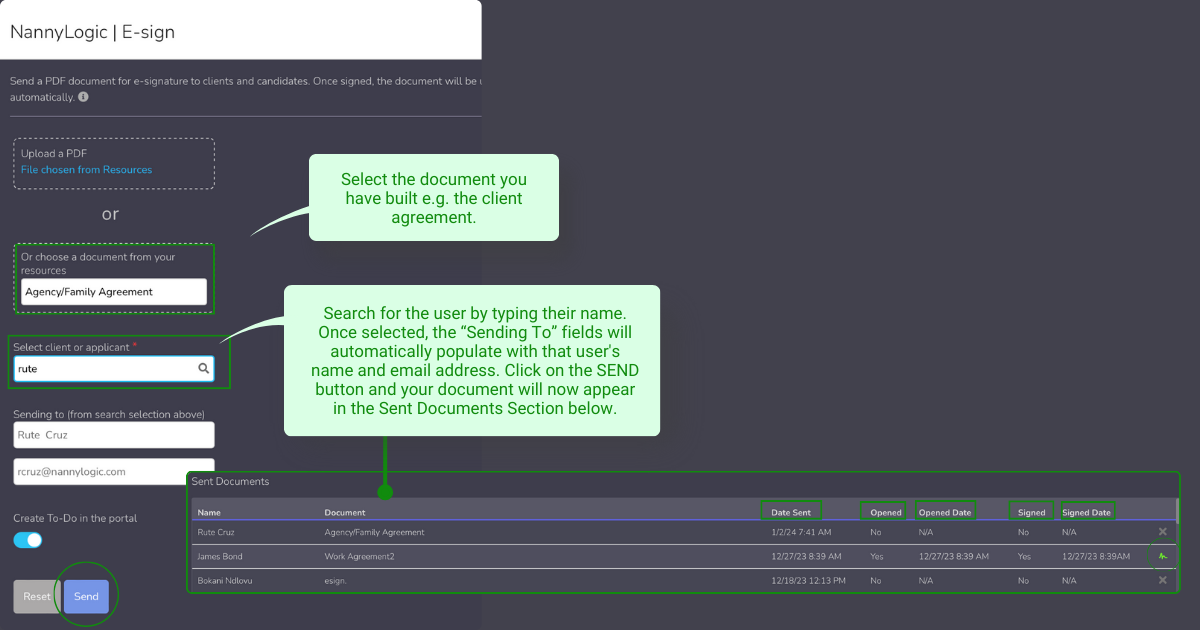
To send these documents:
- Navigate to the e-sign tab.
- Search for the desired applicant.
- Track document views, openings, and signatures to stay informed about the progress.
See below the step-by-step images.
Navigate to the Resources and create a template.
Next, build your document.
Send your document using the E-sign Tab on the main menu.
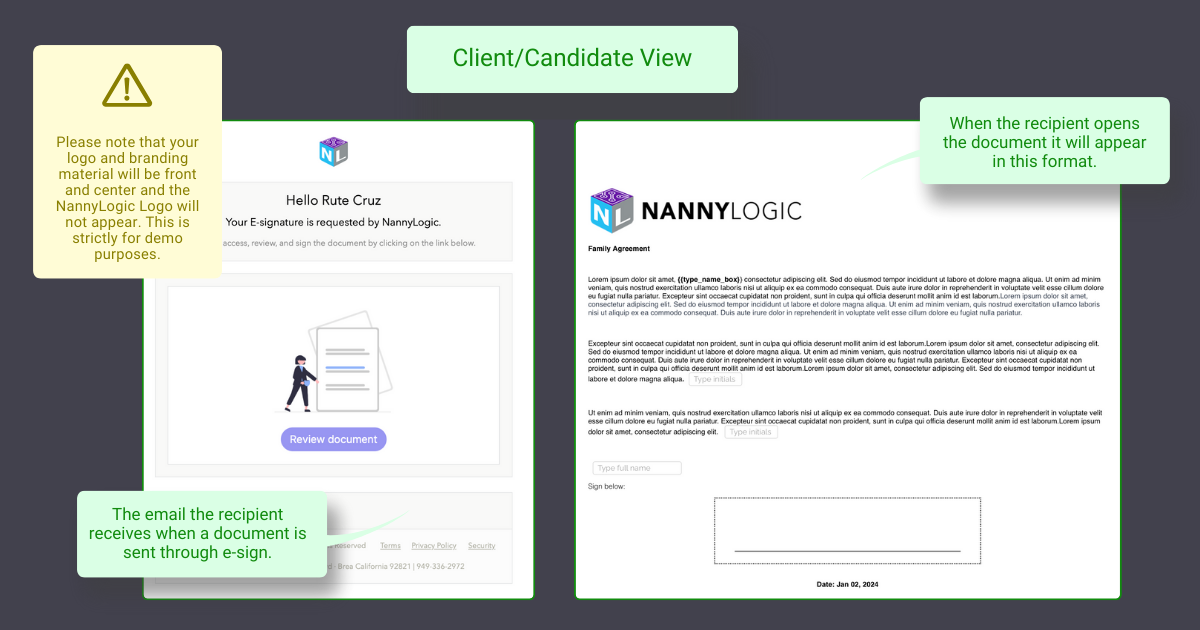
This is how the client/candidate will view the email and document sent by your NannyLogic Platform.